You can easily create new shipment by following below steps.
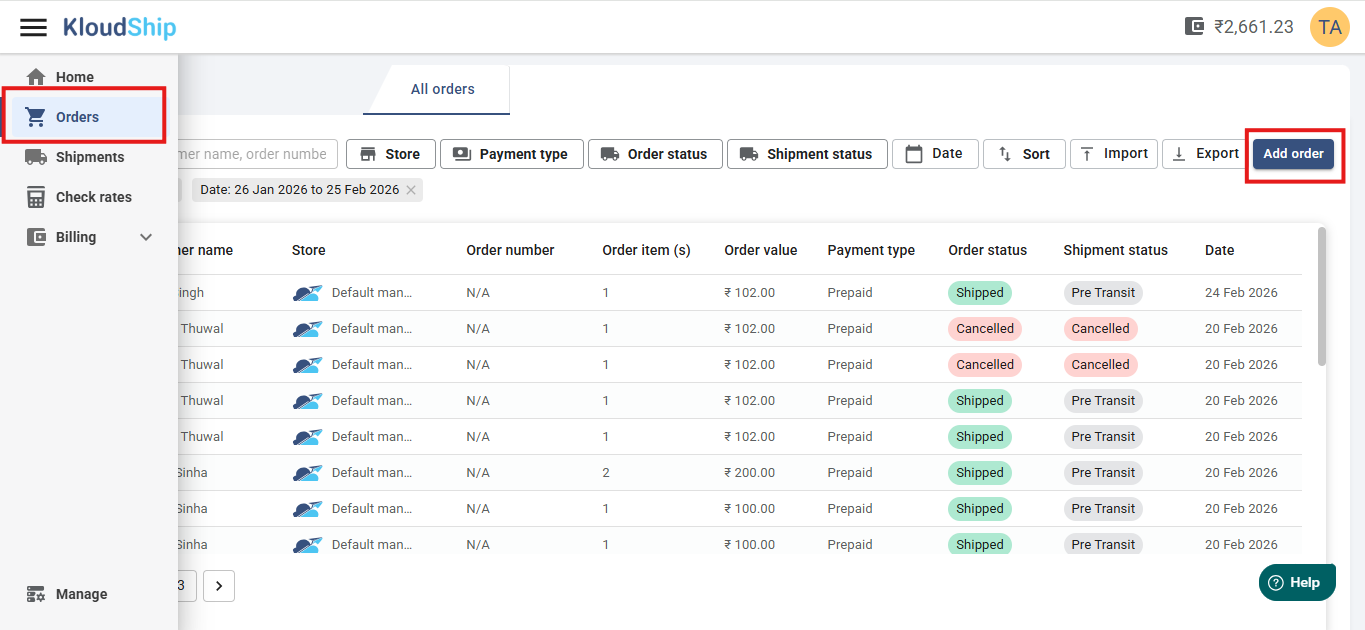
- From side menu navigate to Orders and click on Add order.
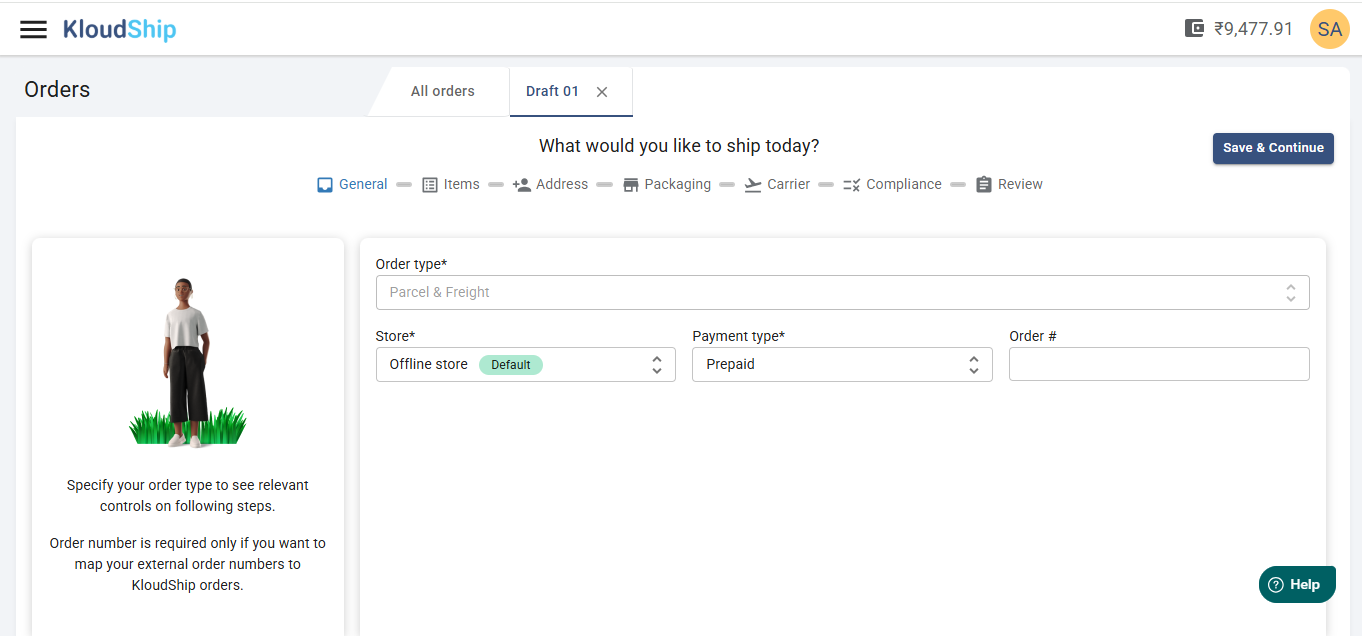
- In this step provide general details like order type, store, payment type (Prepaid/COD), order number (optional) and click on save & continue.
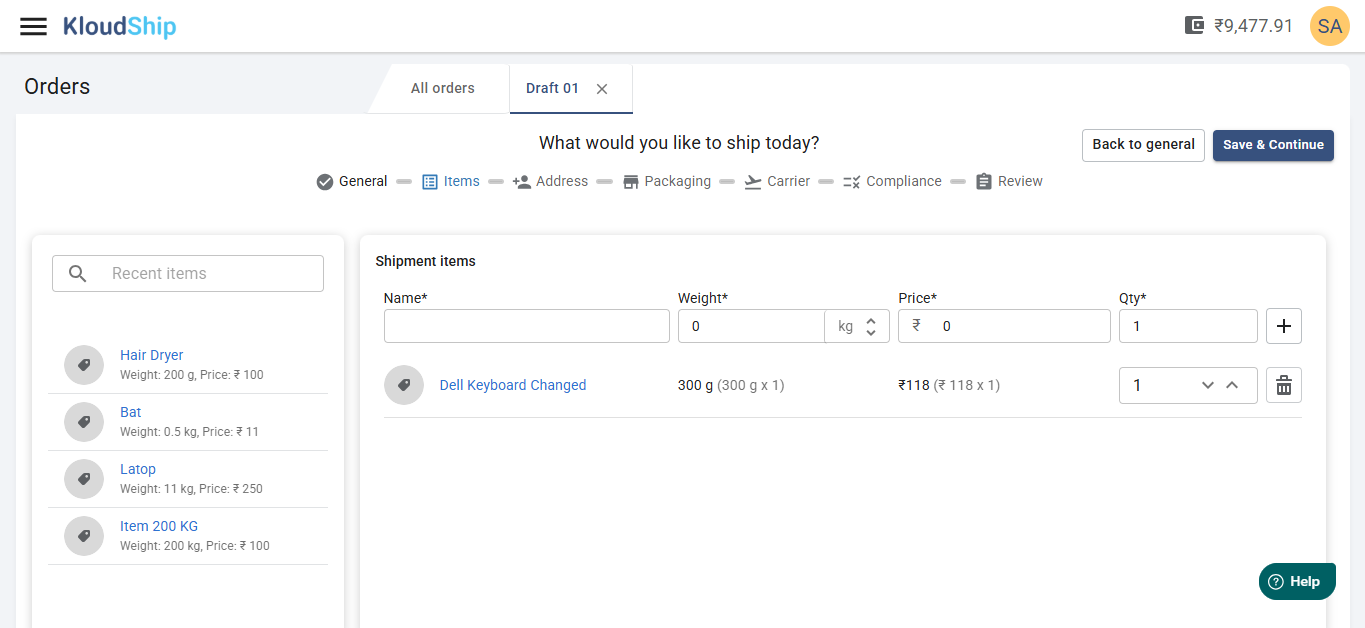
- Now provide item details
- Item name
- weight
- price
- quantity
- Add Item Button: Click the "+" button to add the item to the shipment. and click on save and continue.
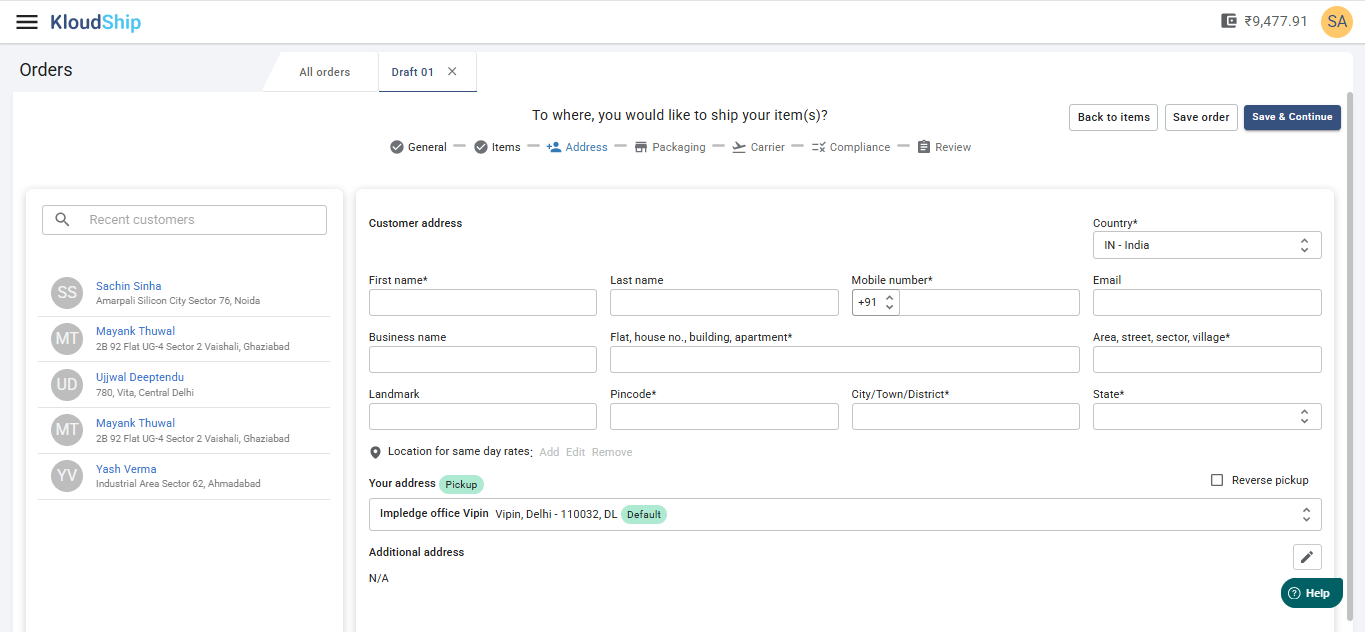
- Provide Pickup and receiver address and click on save & continue.
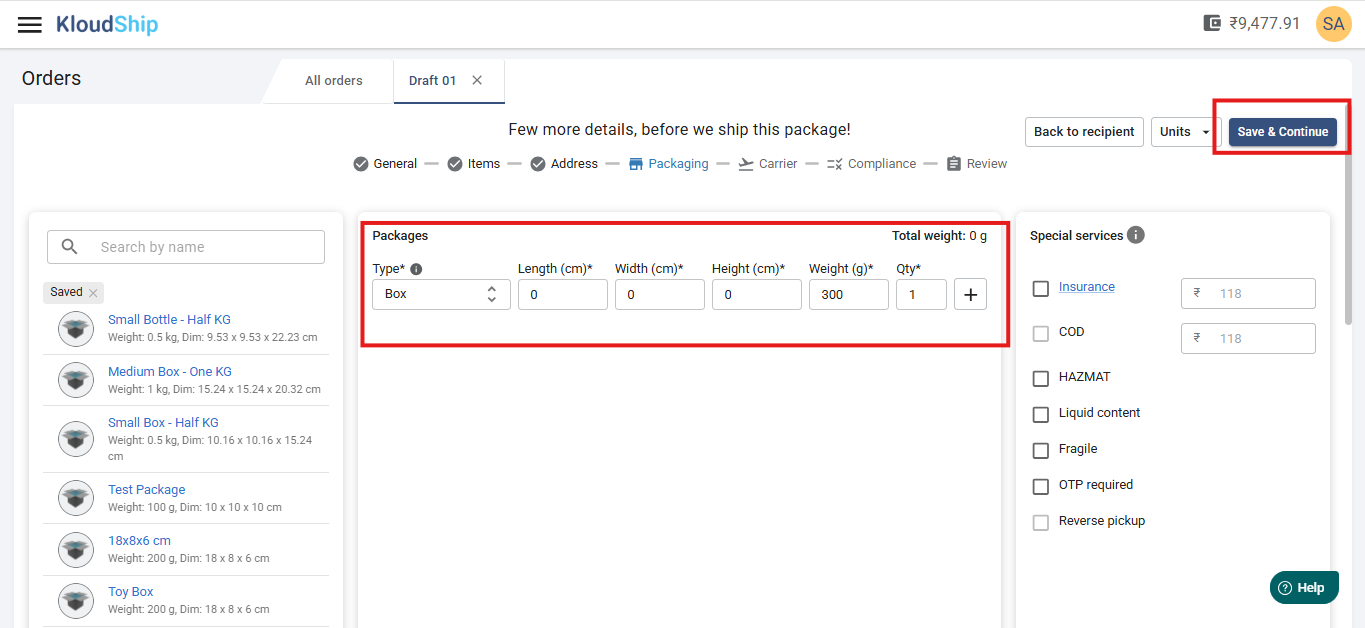
- Provide package details and click on save & continue.
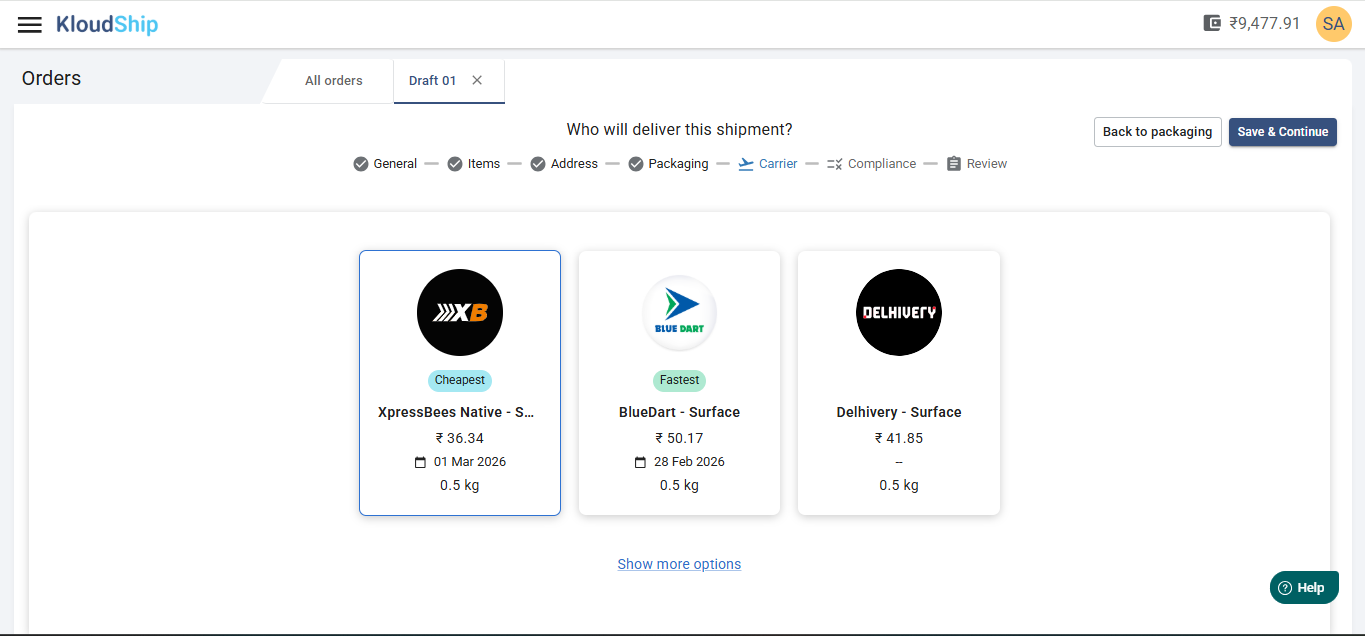
- Select your preferred rate and click on save & continue.
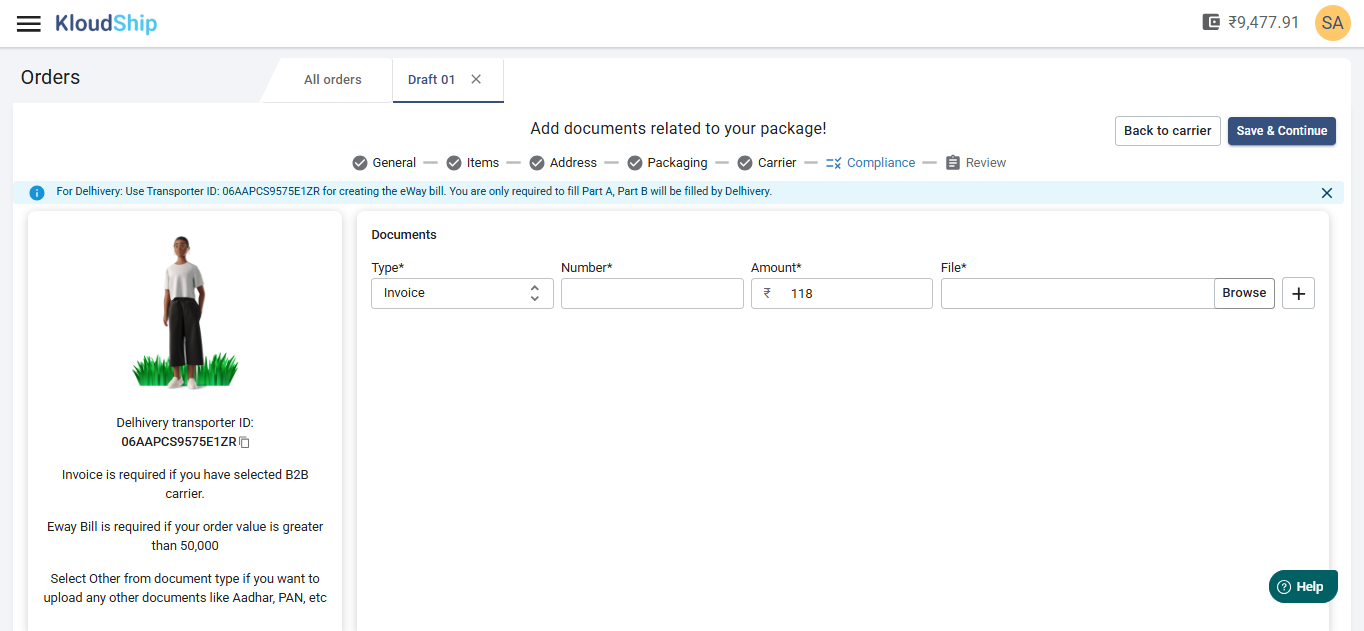
- Provide insurance if required and E-way bill (if order value is more than 50,000) and click on save & continue.
- Review your details if all looks good then click on create shipment button.
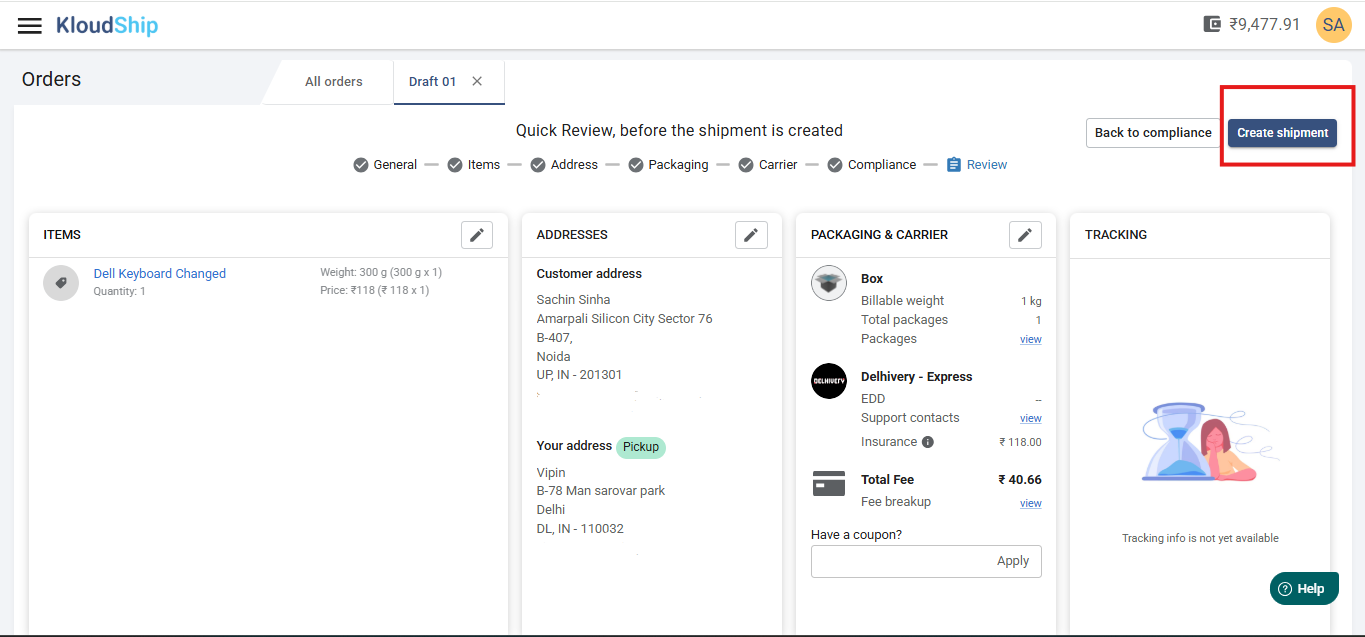
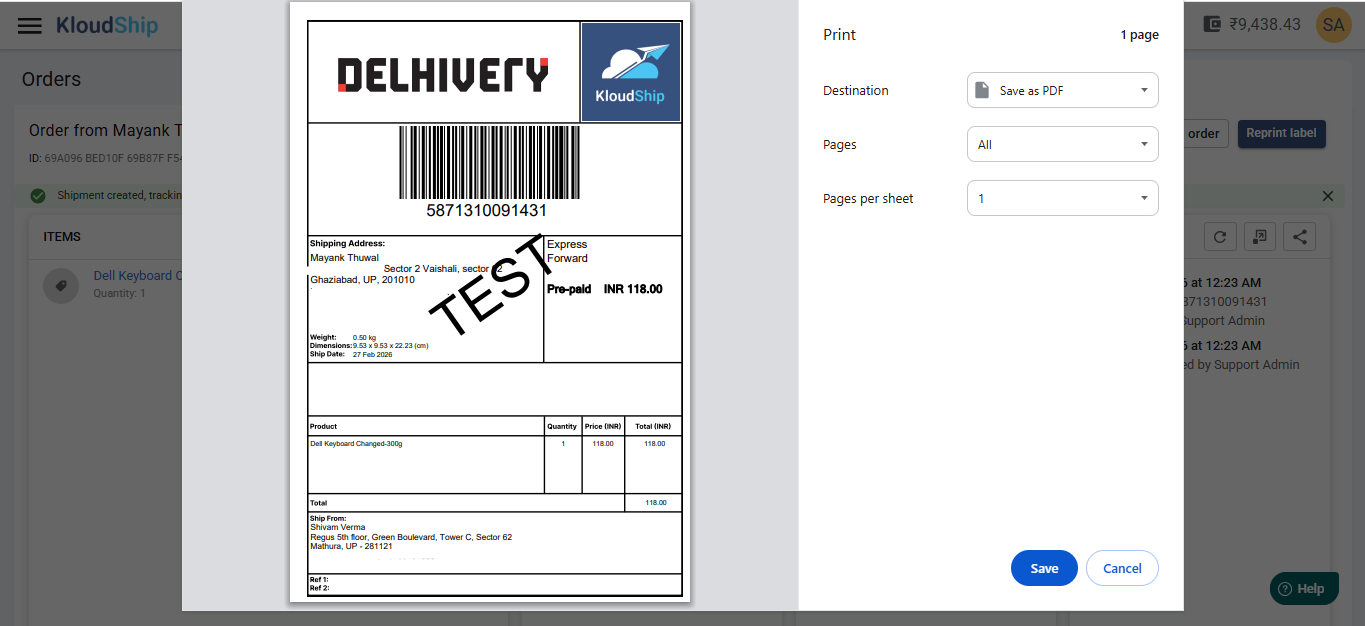
- After shipment is created successfully you will get a label .
- Print the label and paste it in Package/Box.
What's Next
- Create a shipment with insurance: Follow the article to create shipment with insurance.
- Track Shipment: Follow this article to see how you can track a shipment
- Reprint Label: In case you need a second copy of your label, follow this article
- Cancel Shipment: You can cancel a shipment if you do not want to ship this package
- Clone Shipment: You can clone a shipment if you want to ship another package to the same address.
Not Yet Signed Up?
Was this article helpful?
That’s Great!
Thank you for your feedback
Sorry! We couldn't be helpful
Thank you for your feedback
Feedback sent
We appreciate your effort and will try to fix the article